R03 SERIES Smart sensor for tension and compression force
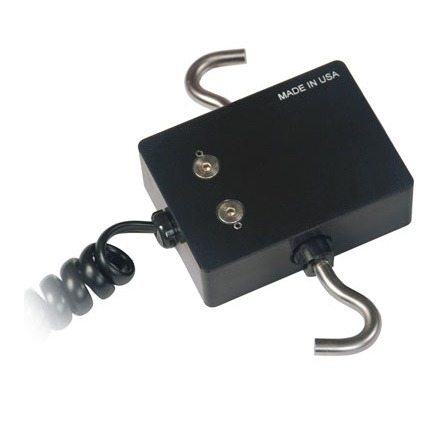
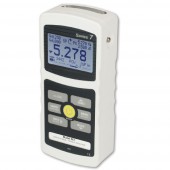
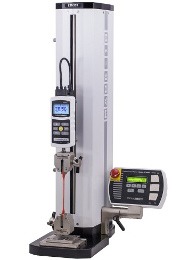
The Series R03 smart sensors are versatile in their application, with tension and compression measurements and threaded holes that accept a variation of attachments. This sensor can be used attached to a test stand as wel as in an in-line configuration.
With its Plug & Test® system connection this sensor is attached to a Mark-10 Indicator, 3I, 5I, 7I or a Series F test stand. This system has the benefit of an internal pcb which stores calibration and configuration, this makes an indicator interchangeable during testing.
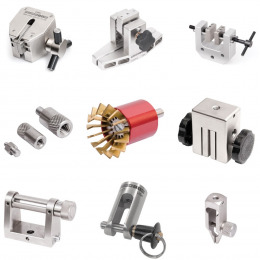
The R03 sensors are available in 8 versions ranging from 1 to 500 N and can be attached to a test stand using optional brackets AC1018 or AC1062 and in an in-line configuration using optional G1038 hooks mounted to both ends. Other attachments can be found in the Mark-10 attachment section of this website.
Features
- Compatible with the Series 7i, 5i and 3i digital indicators
- Unique Plug & TestTM connector holds all calibration and configuration data
- Smart sensor with rugged aluminum housing
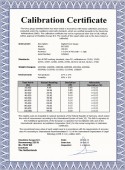
- NIST-traceable certificate of calibration included
- Measures tensile and compressive forces
- Warranty: 3 years
- Measures tensile and compression forces from 1 N to 500 N
- Inline force sensor
General information
Mark-10 M7I, M5I, and M3I indicators are used in combination with Plug & Test® sensors and can therefore accommodate numerous force and torque measurement requirements, from 1 N to 50 kN (0.25 to 10,000 lbF) of force, and from 7 Ncm to 550 Nm (10 ozFin to 5,000 lbFin) of torque.
Plug & Test® sensors can be used handheld or mounted to a fixture or test stand for more accurate and repeatable testing results.
The sensors are separately calibrated therefore they can be disconnected from one indicator and connected to another without the need for re-calibration or re-configuration as this is stored in the PCB located inside the smart connector.
Accuracy
System accuracy is determined by the combination of Indicator and sensor combined. To determine the total system accuracy the accuracy value of the sensor is added to the value of the indicator.
As the Indicators have different accuracy values the total system accuracy may vary between the different indicator/sensor combinations. Indicator Model Accuracy M7I / M5I ±0,1% of full scale M3I ±0,2% of full scale.
Example 1 Model MR01-100 sensor with Model M5I Indicator MR01-100 ±0,15% of full scale + M5I ±0,1% of full scale = Total ±0,25% of full scale This translates into a fixed error of up to: 0,25% x 500 N = 1,25 N
Example 2 Model MR50-50Z sensor with Model M3I Indicator MR50-50Z ±0,35% of full scale + M3I ±0,2% of full scale = Total ±0,55% of full scale This translates into a fixed error of up to: 0,55% x 50 Ncm = 0,275 Ncm
Because accuracy is defined as a percentage of full scale, the fixed error is possible anywhere on the scale from 0 to the capacity. As such, this value represents an increasingly large error as percentage of reading towards the low end of the scale. It is, therefore, recommended that a sensor is selected with capacity as close as possible to the expected load. The resolution may be different for some sensors depending on whether a M7I, M5I, or M3I indicator is being used. For example, a Series R01 force sensor will display finer resolution when connected to a M5I indicator than when connected to a M3I indicator.
Dimensions
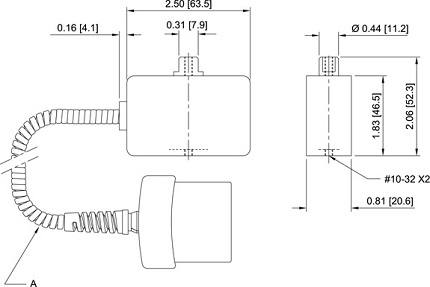
Dimensions for the Series R03 force sensors, all dimensions are in Inch with [mm] behind
MR03-XXX Cable length 24 in [610 mm], coiled, when retracted 10 ft [3 m], coiled, when stretched
MR03-XXX-1* Cable length 10 in [254 mm], straight*
* Add suffix “-1” for shortened cable, for use on ESM1500, ESM750, ESM303, and ESM303H test stands.
Ex: MR03-100-1. Test stand mounting hardware is included.
| Model | N | mN | kgF | gF | ozF | lbF |
|---|---|---|---|---|---|---|
| MR03-025 | 1 x 0,0005 | 1000 x 0,5 | - | 100 x 0,05 | 4 x 0,002 | 0,25 x 0,0001 |
| MR03-05 | 2,5 x 0,001 | 2500 x 1 | - | 250 x 0,1 | 8 x 0,005 | 0,5 x 0,0002 |
| MR03-2 | 10 x 0,005 | - | 1 x 0,0005 | 1000 x 0,5 | 32 x 0,02 | 2 x 0,001 |
| MR03-5 | 25 x 0,01 | - | 2,5 x 0,001 | 2500 x 1 | 80 x 0,05 | 5 x 0,002 |
| MR03-10 | 50 x 0,02 | - | 5 x 0,002 | 5000 x 2 | 160 x 0,1 | 10 x 0,005 |
| MR03-20 | 100 x 0,05 | - | 10 x 0,005 | 10000 x 5 | 320 x 0,2 | 20 x 0,01 |
| MR03-50 | 250 x 0,1 | - | 25 x 0,01 | 25000 x 10 | 800 x 0,5 | 50 x 0,02 |
| MR03-100 | 500 x 0,2 | - | 50 x 0,02 | 50000 x 20 | 1600 x 1 | 100 x 0,05 |
| Model | N | gF | kgF | lbF |
|---|---|---|---|---|
| MR03-025 | 1 x 0,001 | 100 x 0,1 | - | 0,25 x 0,0002 |
| MR03-05 | 2,5 x 0,002 | 250 x 0,2 | - | 0,5 x 0,0005 |
| MR03-2 | 10 x 0,01 | - | 1 x 0,001 | 2 x 0,002 |
| MR03-5 | 25 x 0,02 | - | 2,5 x 0,002 | 5 x 0,005 |
| MR03-10 | 50 x 0,05 | - | 5 x 0,005 | 10 x 0,01 |
| MR03-20 | 100 x 0,1 | - | 10 x 0,01 | 20 x 0,02 |
| MR03-50 | 250 x 0,2 | - | 25 x 0,02 | 50 x 0,05 |
| MR03-100 | 500 x 0,05 | - | 50 x 0,05 | 100 x 0,1 |
Specifications
| Accuracy: | ± 0.15% of full scale + indicator |
| Weight: | 0.2 kg |
| Warranty: | 3 years |
Model-3I Force/Torque Indicator
- Interchangeable force and torque sensors through Plug & Test® technology (sensors are sold separately)
- High-speed 2.000 Hz sampling rate
- Ultra-compact size
More details
Model-5I Advanced Digital Force/Torque Indicator
- Interchangeable force and torque sensors through, separately sold, Plug & Test® technology
- High-speed 7.000 Hz sampling rate
- USB, RS-232, Mitutoyo, and analog outputs
More details
Model-7i Advanced Force/Torque Indicator
- Interchangeable force and torque sensors through Plug & Test® technology (sensors are sold separately)
- High-speed 14.000 Hz sampling rate
- Continous data capture of up to 5.000 data points, at up to 14.000 Hz, downloadable to a PC
- 5 units of measurement, plus Coefficient of Friction and user-defined unit with configurable name
More details
Cic-Force Calibration Force Gauge
- Short turnaround
- Exclusively in accordance with Deutscher Kalibrierdienst (DKD) working standards, class F1; calibration-no: 19026 - 07
- Possibility to adjust and repair
More details
Motorized Force Test Stands
Discover our motorised test stands designed for precise force measurements in any industry or lab setting. Features flexible configurations and easy data export.
More details
Buy Now
Availability: Available: 1 - 3 days, Delivery time: 1 - 3 weeks, special order request

