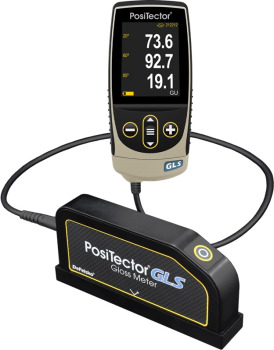
Gloss Meters
Measuring gloss during the manufacturing process can enhance production by identifying issues, ensuring consistency, reducing waste, and improving overall quality. Factors such as surface texture, coating properties, and paint application significantly influence a coating’s appearance. Although the human eye can easily distinguish large differences in gloss, such as between a matte military asset and a glossy red sports car, smaller variations can be harder to detect. However, these minor differences can still significantly impact process control.
When light strikes a surface, part of it is absorbed while the rest is reflected. The reflected light determines how the object is perceived. The nature of this reflection is typically influenced by the surface finish. On a smooth, polished surface like a mirror, light is reflected directly opposite to the angle of incidence, a phenomenon known as ‘specular’ reflection. In contrast, on a rough surface, light is scattered in many directions, with only a small portion reflecting at the specular angle.
Reflectance is a measurement of the amount of light detected versus the amount of light sent and is expressed as a percentage. Gloss meters such as the PosiTector GLS can display in both GU and percent reflectance directly on the gage.
Per ISO 2813, Gloss Value is a ratio of the reflectance of the test specimen to the reflectance of a standard polished black glass surface “with a refractive index of 1,567 at a wavelength of 587.6 nm in the specular direction”, multiplied by 100. It is expressed in terms of Gloss Units.
The Haze Index is a measure of the light scattering properties of a surface. It quantifies the degree to which light is diffused when it is reflected off a surface, rather than being reflected in a single, clear direction. A high Haze Index indicates that a surface causes significant light scattering, leading to a hazy or milky appearance, whereas a low Haze Index suggests a clearer and more defined reflection. This metric is crucial in industries where surface quality and appearance are critical, such as in automotive, electronics, and coatings manufacturing.
ISO 2813 is an international standard that specifies a method for measuring the specular gloss of non-metallic paint films and coatings. The standard outlines the use of a glossmeter to quantify the gloss at specific angles of incidence—commonly 20°, 60°, and 85°.
Key points about ISO 2813:
Scope: It applies to non-metallic paint films and coatings, providing a standardized method to ensure consistency in gloss measurements. Angles of Measurement:
20° angle: Used for high-gloss surfaces.
60° angle: General measurement angle applicable to a wide range of gloss levels.
85° angle: Used for low-gloss or matte surfaces.
Glossmeter Usage: A glossmeter is an instrument that directs a beam of light at the specified angle onto the surface and measures the amount of reflected light. The gloss level is expressed as gloss units (GU). Importance: Consistent gloss measurement helps in quality control, ensuring that products meet specified appearance standards and maintain uniformity across batches.
By adhering to ISO 2813, manufacturers can achieve reliable and comparable gloss measurements, facilitating better quality control and product consistency.
PosiTector GLS Portable Gloss Meter

|
|
|
