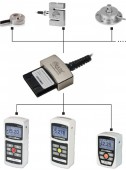
R51 Series Universal Torque Sensors for bi-directional torque testing
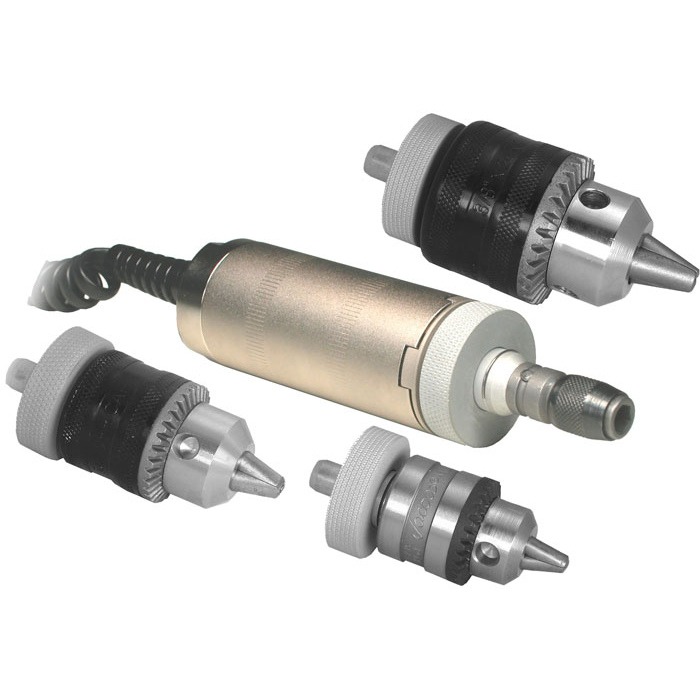
![]() The Series R51 torque sensors are developed to accommodate a variety of testing applications across a wide industrial spectrum. This series features a unique interchangeability with three different size chucks and a bit holder (sold separately), measures in both directions and is available in 6 versions ranging from 7 Ncm to 11,5 Nm.
The Series R51 torque sensors are developed to accommodate a variety of testing applications across a wide industrial spectrum. This series features a unique interchangeability with three different size chucks and a bit holder (sold separately), measures in both directions and is available in 6 versions ranging from 7 Ncm to 11,5 Nm.
The sensor connects to an I3, I5 or I7 indicator (sold separately) using the Plug & Test® system. This stores the calibration and configuration data in its internal PCB.
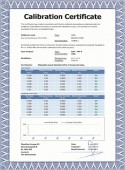
Delivery includes a certificate of calibration which contains 10 data points in each measuring direction.
A R51 Series sensor in combination with an Indicator can be used as handheld devices or as a complete torque test system with a TSTM-DC motorized torque test stand.
We are happy to assist you in finding the most suitable configuration for your needs. Please contact us for more information.
Features
- Compatible with the Series 7i, 5i and 3i digital indicators
- Unique Plug & TestTM connector holds all calibration and configuration data
- Outstanding overload protection
- Interchangeable chucks (order separately)
- NIST-traceable certificate of calibration included
- Capacities from 7 to 1150 Ncm
- 3 years warranty
General information
Mark-10 M7I, M5I, and M3I indicators are used in combination with Plug & Test® sensors and can therefore accommodate numerous force and torque measurement requirements, from 1 N to 50 kN (0.25 to 10,000 lbF) of force, and from 7 Ncm to 550 Nm (10 ozFin to 5,000 lbFin) of torque.
Plug & Test® sensors can be used handheld or mounted to a fixture or test stand for more accurate and repeatable testing results.
The sensors are separately calibrated therefore they can be disconnected from one indicator and connected to another without the need for re-calibration or re-configuration as this is stored in the PCB located inside the smart connector.
Accuracy
System accuracy is determined by the combination of Indicator and sensor combined. To determine the total system accuracy the accuracy value of the sensor is added to the value of the indicator.
As the Indicators have different accuracy values the total system accuracy may vary between the different indicator/sensor combinations. Indicator Model Accuracy M7I / M5I ±0,1% of full scale M3I ±0,2% of full scale.
Example 1 Model MR01-100 sensor with Model M5I Indicator MR01-100 ±0,15% of full scale + M5I ±0,1% of full scale = Total ±0,25% of full scale This translates into a fixed error of up to: 0,25% x 500 N = 1,25 N
Example 2 Model MR50-50Z sensor with Model M3I Indicator MR50-50Z ±0,35% of full scale + M3I ±0,2% of full scale = Total ±0,55% of full scale This translates into a fixed error of up to: 0,55% x 50 Ncm = 0,275 Ncm
Because accuracy is defined as a percentage of full scale, the fixed error is possible anywhere on the scale from 0 to the capacity. As such, this value represents an increasingly large error as percentage of reading towards the low end of the scale. It is, therefore, recommended that a sensor is selected with capacity as close as possible to the expected load. The resolution may be different for some sensors depending on whether a M7I, M5I, or M3I indicator is being used. For example, a Series R01 force sensor will display finer resolution when connected to a M5I indicator than when connected to a M3I indicator.
Dimensions
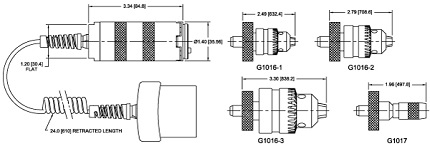
Dimensions of the R51 torque sensor with Plug & Test connector and optional chucks and bit holder.
All dimensions are in Inch with [mm] behind.
| Model | Nm | Ncm | Nmm | kgFmm | gFcm | lbFft | ozFin | lbFin |
|---|---|---|---|---|---|---|---|---|
| MR51-10Z | - | 7 x 0,005 | 70 x 0,05 | 7 x 0,005 | 700 x 0.5 | - | 10 x 0,005 | - |
| MR51-20Z | - | 14 x 0,01 | 140 x 0,1 | 14 x 0,01 | 1400 x 1 | - | 20 x 0,01 | - |
| MR51-50Z | - | 35 x 0,02 | 350 x 0,2 | 36 x 0,02 | 3600 x 2 | - | 50 x 0,02 | - |
| MR51-12 | 1,35 x 0,001 | 135 x 0,1 | - | - | - | 1 x 0,0005 | 192 x 0,1 | 12 x 0,005 |
| MR51-50 | 5,7 x 0,005 | 570 x 0,5 | - | - | - | 4 x 0,002 | 800 x 0,5 | 50 x 0,02 |
| MR51-100 | 11,5 x 0,005 | 1150 x 0,5 | - | - | - | 8 x 0,005 | 1600 x 1 | 100 x 0,05 |
| Model | Ncm | kgFmm | ozFin | lbFin |
|---|---|---|---|---|
| MR51-10Z | 7 x 0,005 | 7 x 0,005 | 10 x 0,01 | - |
| MR51-20Z | 14 x 0,01 | 14 x 0,01 | 20 x 0,02 | - |
| MR51-50Z | 36 x 0,05 | 36 x 0,05 | 50 x 0.05 | - |
| MR51-10 | 135 x 0,1 | - | 192 x 0,2 | 12 x 0,01 |
| MR51-50 | 570 x 0,5 | - | 800 x 1 | 50 x 0,02 |
| MR51-100 | 1150 x 1 | - | 1600 x 2 | 100 x 0,1 |
Accessories
G1016 - G1017 Attachments for R51 Torque Sensor
- Secures fixtures, bits, or samples during torque testing
- 11,5 Nm capacity
- Available in three chuck sizes and a bit holder
More details
Specifications
| Accuracy: | ± 0,20% of full scale + indicator |
| Weight: | 0,6 kg |
| Shipping weight | 1,4 kg |
| Warranty: | 3 years |
Related Products
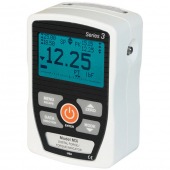
Series-3I Force/Torque Indicator
- Interchangeable force and torque sensors through Plug & Test® technology (sensors are sold separately)
- High-speed 2.000 Hz sampling rate
- Ultra-compact size
More details
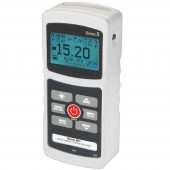
Series-5I Advanced Digital Force/Torque Indicator
- Interchangeable force and torque sensors through, separately sold, Plug & Test® technology
- High-speed 7.000 Hz sampling rate
- USB, RS-232, Mitutoyo, and analog outputs
More details
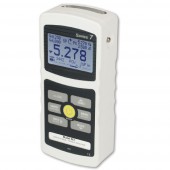
Series-7I Advanced Force/Torque Indicator
- Interchangeable force and torque sensors through Plug & Test® technology (sensors are sold separately)
- High-speed 14.000 Hz sampling rate
- Continous data capture of up to 5.000 data points, at up to 14.000 Hz, downloadable to a PC
- 5 units of measurement, plus Coefficient of Friction and user-defined unit with configurable name
More details
PTA PTA/PTAF Plug & Test Load Cell Adapter
- Compatible with strain gage-based load cells, force sensors, and torque sensors
- Program the adapter via USB or RS-232 through the indicator
More details
Buy Now
Availability: Available: 1 - 3 days, Delivery time: 1 - 3 weeks, special order request

